For some customer, they’d like to use BTS4000 for high frequency(such as 500ms), so they’d set up a testing script likes the following picture:
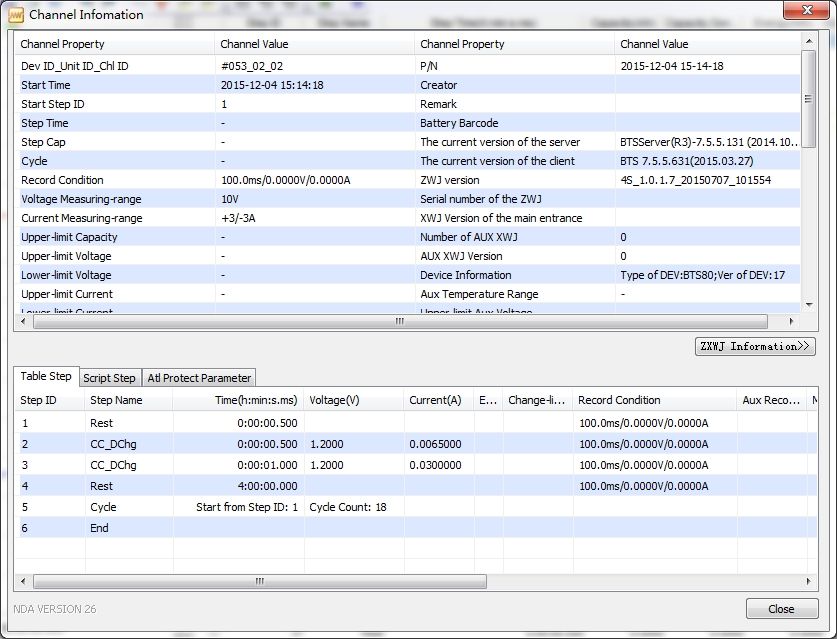
But when looking at the testing result, the data is not correct, please refer to the following picture, the current is very small or even 0.
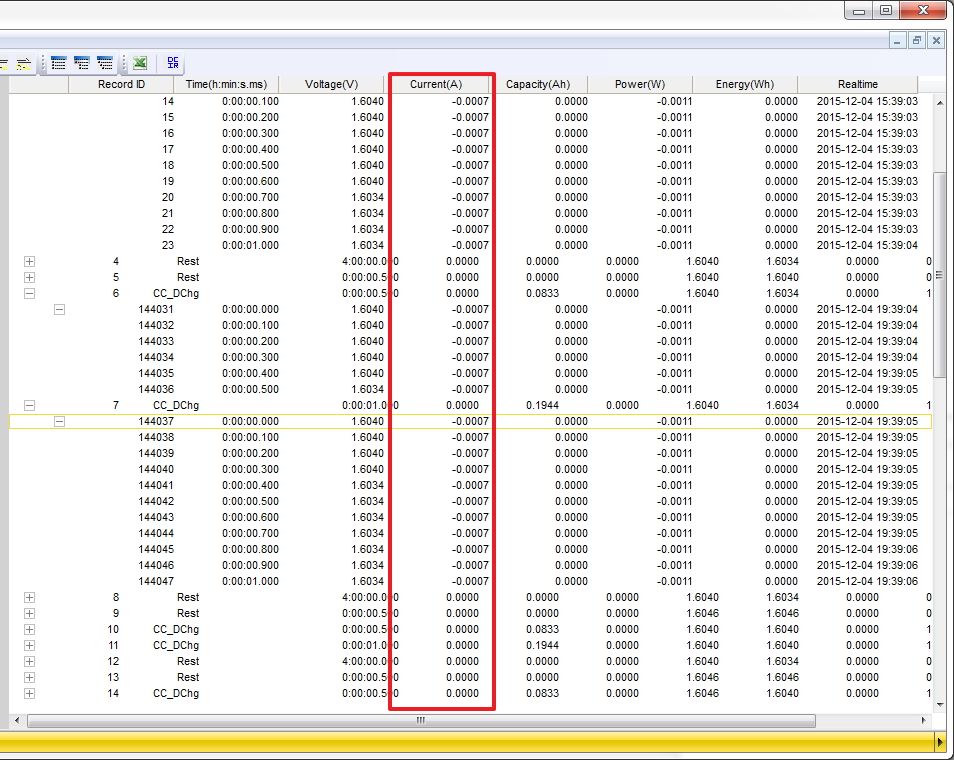
That’s strange, right? So if you want to use regular testing script for high frequency test, it can’t be correct. Then what should you do with this?
Pulse test is the correct way to make it.
Let’s see the result in the following picture firstly, it’s correct, right? The current output is correct, and the data in graph is beautiful. Exactly what you want, right?
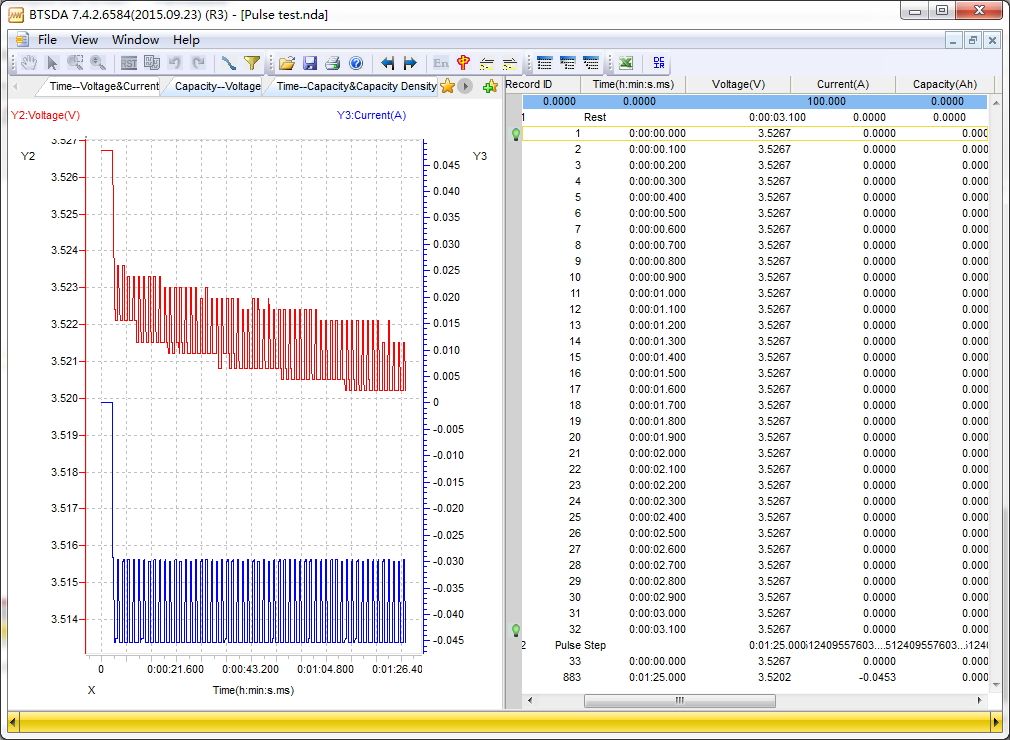
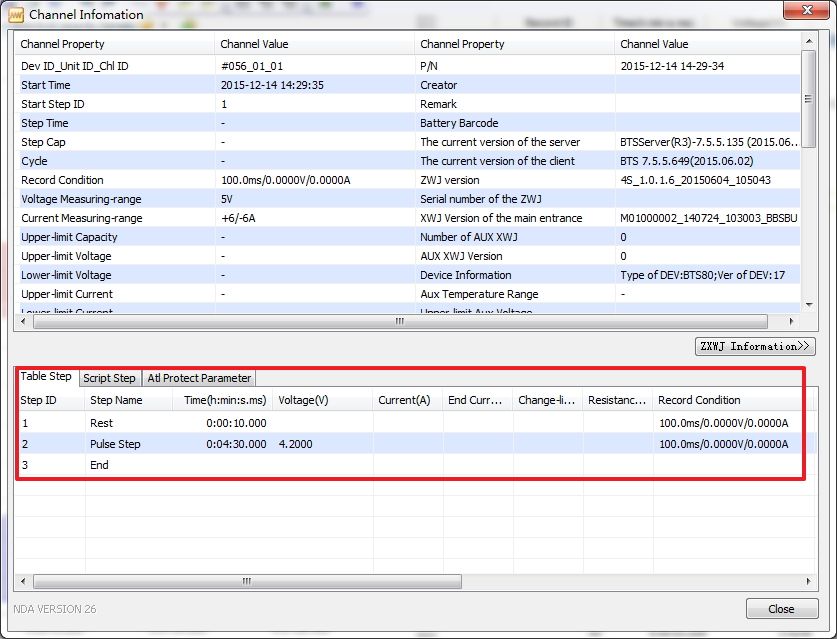
And abvie is how the pulse step information looks like in the NDA data when you right click in BTSDA and choose “channel information” from the pop-up menu.
So if you also want to perform high frequency test on BTS4000, please start up a pulse test to get the correct result. And you can use the ‘BuildTest‘ tool which included in the BTS software, you can find and start it from the Windows start up menu. For the typical pulse test script, it looks like the following picture:
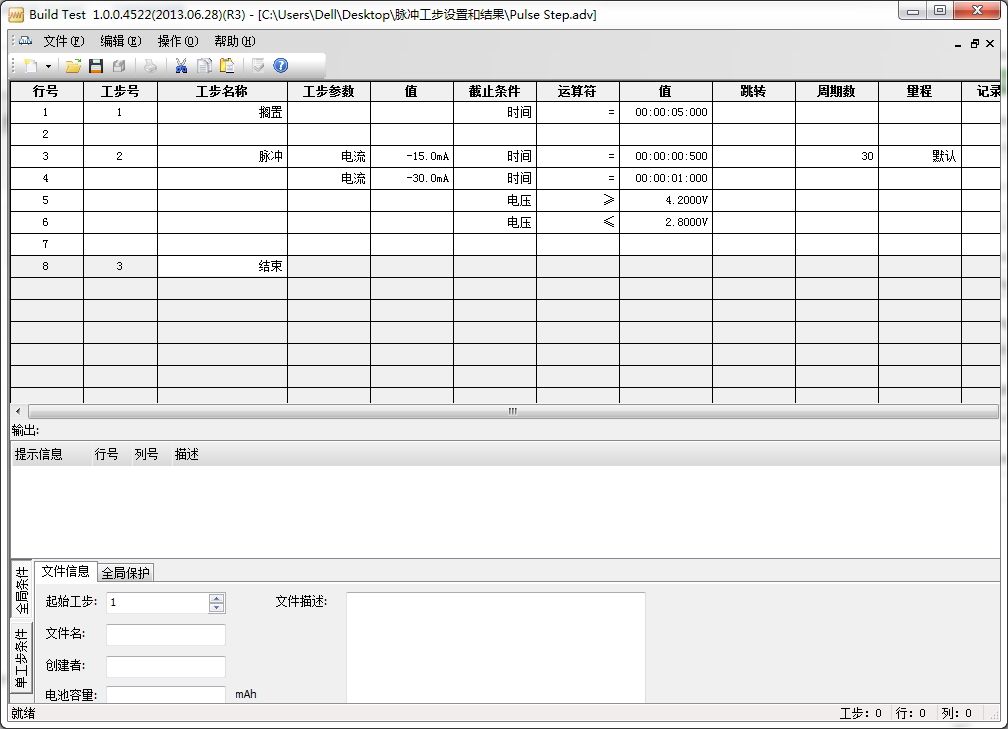
You can download a pulse test sample script and open it with BuildTest for reference.
Comments are closed.


